


*Please use care and caution when felting, the needles are very sharp! Not recommended for children.*
Gather your supplies:
- Filges fairy wool in neutral colours
- Filges felting foam block
- 2 white pipe cleaners
- Filges - 4 felting needles (I used the ‘smooth’ ones)
- Filges felting needle holder.
Prepare your space:
Find a well lit area of your home, with a sturdy and flat space. I use my foam block to store the needles in when not using, so they don’t roll around or accidentally poke you.
Prepare your needle holder (if using one):
Unscrew the handle from the needle holder, and insert 3 needles carefully. Replace handle by screwing on.

Start by taking your pipe cleaner and folding it in half once, and then in half again. Twist the pipe cleaner to make a sturdy structure for the inner part of your lamb’s legs. Repeat with the second pipe cleaner. You will have two 3” twisted pipe cleaners.
Start by taking your pipe cleaner and folding it in half once, and then in half again. Twist the pipe cleaner to make a sturdy structure for the inner part of your lamb’s legs. Repeat with the second pipe cleaner. You will have two 3” twisted pipe cleaners.
Grab a piece of fairy wool, in white, about the length of your hand and the width of 2 fingers, and begin wrapping it around one of the pipe cleaners. You’ll want to make sure the pipe cleaner is completely covered in wool. Wrap tightly.
Once wrapped, grab your foam block and single felting needle and begin to slowly poke the wool all the way through, into the foam block. Felt the end bit of wool first, to help it secure to itself. Then work your way around, making sure to get the ends which will form the bottoms of the feet. Repeat this many, many times until your entire pipe cleaner has an even, firm wool coating surrounding it. It will take time, 5 to 10 minutes depending on how slow you go. Slow is ok!
Repeat steps 5 and 6 for the second pipe cleaner. You now have your lamb’s legs!

Grabbing another piece of white wool, you’ll want to form the head. This piece should be slightly smaller than a golf ball. Use the single needle to felt until firm.
Ears are up next! Use your foam block, two small pieces of white fairy wool, and your single needle to felt the shape of the ears. I like to leave a bit of extra wool at the base of the ears to help attach it to the head in the next coming steps. Felt the inside of the needle to create the inner ear part, giving a more realistic look to them. *If you have light pink fairy wool, feel free to take the tiniest amount and felt it into the inner ears.*
Lastly, you’ll want another small piece of white wool to make the tail. Using the single needle and foam block, form a small tail, about the size of a tic tac. It’s helpful here to leave a bit of loose, extra wool at the base like we did for the ears, to help attach it to the body.

Once the legs, head, ears, and tail are attached you can grab 3 small balls and a thin string of your darkest colour, these will make the eyes, nose and mouth. The small balls will be rolled between your finger until they are the size of a peppercorn. The thin string will only need to be 3 inches or so in length.
Felt the eyes onto the head carefully using the single needle, as well as the nose. Take the thin string of wool, and begin to attach the mouth slightly below the nose. You’ll start at one end of the string, on the far side of the mouth, felting into the head, and then fold the string back over onto itself to thicken up the mouth line.

Finish up by checking that all of the torso is covered in your darker colour, make sure all body parts are securely attached and then guess what? You’re done!
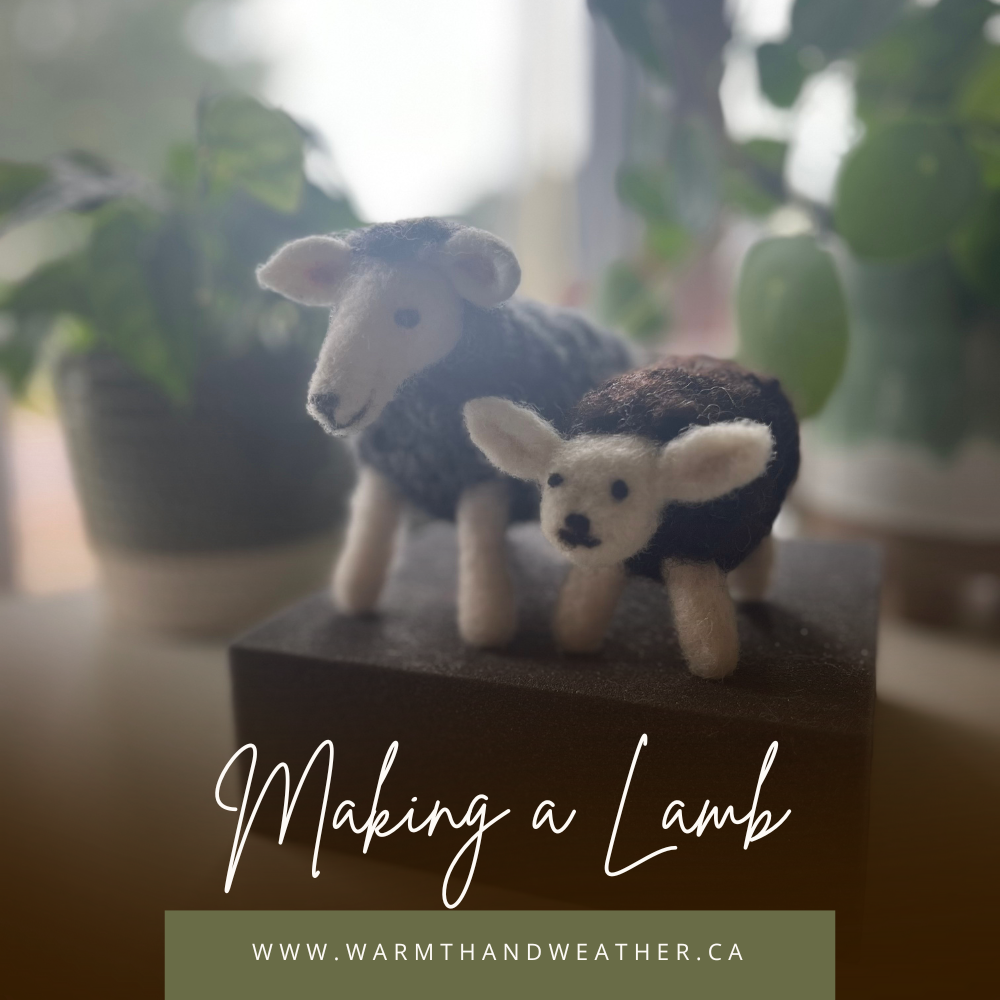
Blog Post and Photos by Courtney Audette
Follow this link to shop Filges crafting supplies now.
