


If you haven't seen yet, we have launched a new crafting line here at Warmth & Weather! The lovely Filges boasts bright colours of wool felt, fibres and yarns, and a variety of tools to help get you started on your very own wool crafting journey.
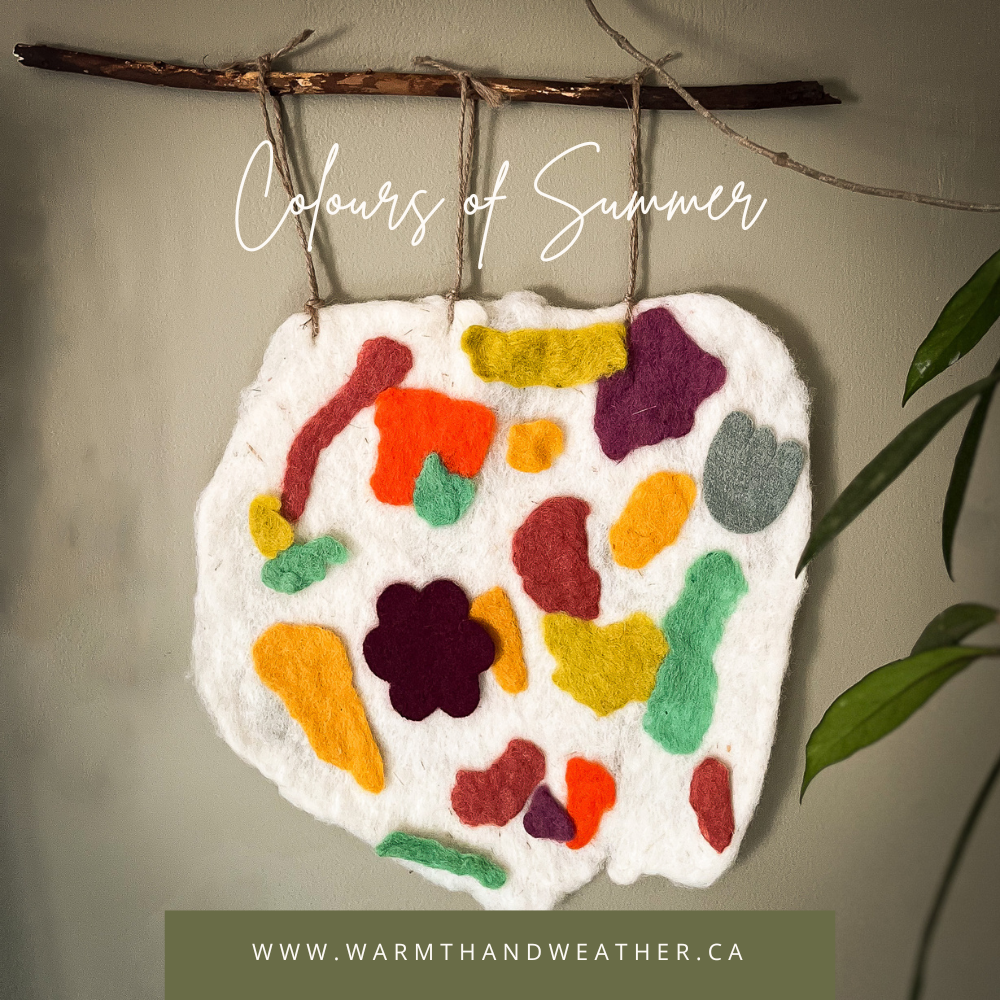
To celebrate and share our excitement, we have a follow-along craft ready for you to try! We'll be making a wall tapestry using a welt felting technique to adhere the fairy wool to itself.
How does wet felting work, you might ask? In wet felting, wool fibers have small barbs up and down the shaft of each strand of fibre, and then through agitation - a process involving water, soap, and a bit of rubbing with your hands - they attach firmly to each other. When you soak the wool in warm, soapy water, the fibers relax and open up. As you rub and agitate the wool, the tiny scales on the fibers hook onto each other and tangle up, forming a thick, sturdy fabric. It's like a magical transformation that turns light and airy fairy wool into art!

Wall Tapestry Step By Step
Gather your supplies: wool felt of varying colours, olive oil soap, warm water, bowl, wooden dowel or beach stick, twine, scissors, plastic wrap, multiple tea towels.
Tear small pieces of coloured wool felt, at least a dozen if making a 12 inch x 12 inch tapestry.

Fill a basin with warm water, and make sure you have your soap (I like to use a bar of olive oil soap) which we will use to felt the wool.
Submerge small piece of felt into water, suds up with soap and begin to agitate it between your hands. The soap will suds up and that’s okay!
Continue to move and work the wool felt between your hands and fingers, dipping into the warm water periodically, until it becomes a ‘solid’ and flat piece. Repeat with each small piece. *It is important to keep the water as hot as you can tolerate, this helps the wool felt!

Choose your background wool colour for your tapestry and lay it out on a tea towel, with a large piece of plastic wrap between the wool and tea towel (acting as a barrier between the water and tea towel).
Position your little wool felted pieces however you’d like on the large, fluffy background piece of wool! Create an abstract pattern, a simple pattern or an image using the various shapes you created in steps 4 and 5.
Once all pieces are where you’d like them to be, sprinkle handfuls of warm, soapy water on top and use your hands to press the water into the wool. This will take time, and it is important not to rush. We want the small wool pieces to begin to felt to the large background.

As you notice the pieces beginning to felt together, grab a second piece of plastic wrap and place it on top of the tapestry. Grab a second tea towel, placing it on top of the plastic wrap.
Gently roll up the tapestry, plastic wrap and tea towel all together, pushing and pulling back and forth as you go, to create more agitation between the wool fibres. Continue this for 5-10 minutes, checking in on the tapestry periodically. It may need repositioning within the plastic wrap (it’s slippery in there!).
Unroll to reveal the tapestry between the plastic wrap. Reposition the plastic wrap so it is covering the whole of the tapestry. Using both hands, agitate the tapestry between your hands by rubbing somewhat vigorously, back and forth, and in circles. I found it helpful to add more warm, soapy water during this step, continuing to agitate and create friction. This can be done for 5-10 minutes as well. You’ll know you’re done once all the pieces have attached to each other!

Once all of the small wool pieces have felted themselves to the background, unroll the tea towels and remove the plastic wrap. Grab a dry tea towel to roll the tapestry in to remove as much excess water as possible. Be gentle here, as you don’t want to stretch the tapestry too much, causing you to loose your pattern/picture.
Gently unroll to reveal your lovely, handcrafted wool wall tapestry!
While the wool is still damp, take a pair of scissors and create a few holes at the top. Cut a few pieces of twine and feed them each through their own hole that you created. Tie into loops.
Slide loops onto your stick or wooden dowel, and you’re now ready to hang your art!
*Bonus step: use wool or thread to embroider quirky and contrasting patterns to your tapestry. French knots add texture, my favourite!*
Visit our Instagram page for a short how-to video!
Find all of our Filges products here.

Blog Post by Courtney Audette